The Barefoot Cook


QUESADILLA CASSEROLE

1 lb ground beef
1/2 cup chopped onion
1 can (8oz) tomato sauce
1 can (8oz) fire roasted chopped tomatoes
1 can (15oz)black beans drained and rinsed
1 can (8oz) corn undrained
1 can (4 1/2oz) chopped green chiles undrained
2 tsp chili powder
1 tsp ground cumin
1 tsp minced garlic
1/2 tsp oregano leaves
1/2 tsp crushed red peppers (optional)
6 flour tortillas (8inch)
2 cups shredded Cheddar cheese

1. Brown ground beef and onion in large skillet on medium-high heat, drain. Add tomato sauce, tomatoes, beans corn and green chiles, mix well. Stir in all of the spices except red pepper. Bring to a boil. Reduce heat to low and simmer 5 minutes. Add red pepper to taste, if desired.
2. Spread 1/2 cup of the beef mixture on bottom of 13x9x2 baking dish sprayed with non-stick cooking spray. Top with 3 of the tortillas, over lapping as needed. Layer with 1/2 of the remaining beef mixture and 1/2 of the cheese. Repeat with remaining tortillas, beef mixture and cheese.
3. Bake in preheated oven at 350 degrees for 15 minutes or until heated through. Let stand 5 minutes before serving.

Prep time 15 minutes, cook time 25 minutes, makes 8 servings


Ingredients

2lbs chicken breast
8 potatoes
1/3 cup Olive Oil
1 1/2 tsp salt
1 TBS fresh Ground Pepper
1 TBS Paprika
2 TBS Garlic Powder
6 TBS Buffalo Sauce


Toppings
2 cups Shredded Cheese
1 cup crumbled Bacon
1 cup diced Green Onion

Instructions
Preheat oven 500F
In a large bowl mix Olive Oil, Salt, Pepper, Paprika, Garlic Powder & Hot Sauce
Cube the potatoes & add to the bowl
Coat a 9x13 dish with cooking spray
Add potatoes, allow for excess sauce in the bowl
Bake the potatoes for 45 minutes, stir every 15 minutes
Cube the chicken & add it to the bowl with the left over sauce
Mix together cheese, bacon & green onion in a small separate bowl
Once potatoes are done, add the uncooked marinated chicken
Then layer the toppings over the chicken
Bake for 15 minutes or until the chicken is cooked


Ingredients:

12 whole Red New Potatoes
3 tablespoons Olive Oil
Kosher Salt to taste
fresh Cracked Black Pepper
Rosemary (or other Herbs of choice) to taste

Bring a pot of water to a boil, add potatoes and cook until the are fork tender.
On a baking sheet, generously drizzle on the olive oil.
Place the potatoes on the baking sheet with space between them.
With a potato masher, gently press down each potato until it is slightly smashed.
Brush the tops of each smashed potato generously with additional olive oil.
Sprinkle each potato with kosher salt, fresh ground pepper and herb of choice.
Bake in oven at 450 degrees for 20-25 minutes until golden brown.
2 lbs ground beef sirloin
1 tbsp olive oil
Salt and fresh ground black pepper to taste
1 tbsp Worcestershire sauce
1 medium onion finely chopped
4 to 6 cloves garlic finely chopped
1 can (6oz) sliced jalapeƱo peppers
2 & 1/2 to 3 tbsp dark chili powder
1 tbsp cumin
1 cup beef stock or broth
1 can (14oz) diced stewed tomatoes
1 can (8oz) tomato sauce
2 cans (15oz each) black beans drained
3 cups Fritos corn chips
2 cups shredded Monterey Jack or cheddar cheese
2 tbsp chopped fresh cilantro
3 scallions chopped

In a large, deep skillet or pot, brown ground beef in evoo over high heat. Season meat with salt and pepper, then add Worcestershire sauce. When meat is browned and crumbled, reduce heat to medium then add onion, garlic and jalapeƱos. Season veggies and meat with chili powder and cumin. Cook together 5 minutes. Stir in broth and scrap up pan drippings. Stir in diced tomatoes, tomato sauce, and black beans. When mixture comes to a boil, reduce heat and simmer 5 minutes more.
Preheat broiler.
Transfer chili to a shallow casserole dish and top with corn chips and cheese. Melt cheese under broiler. Top casserole with cilantro and scallions. Serve.


I saw this recipe in a magazine and decided to try it but I altered the ingredients. It turned out awesome, I think you'll like it!!


Asian Beef With Broccoli

6 tablespoons Soy Sauce
4 tablespoons Rice Vinegar
2 tablespoons Brown Sugar
1 1/2 teaspoons Cornstarch
1 tablespoon Wok Oil
1 tablespoon Chinese Ginger Spice
1 tablespoon Minced Garlic
1 1/2 pound Beef Round Steak, sliced into thin strips
1 small Onion, cut into thin strips
1 small Green Pepper, cut into thin strips
1 head of Broccoli

1. In a small bowl combine the soy sauce, rice vinegar, brown sugar, cornstarch, ginger and minced garlic. Set Aside.
2. Heat wok oil in a wok or skillet over medium heat. Add the steak and stir fry until browned. Add the onions, peppers and broccoli and stir fry for an additional 3 minutes. Add the soy sauce mixture and bring to a boil, stirring constantly. Lower heat and simmer until the sauce thickens, about 1 minute. Serve immediately over white rice or noodles.


Now through the end of October, 2012, the makers of Freschetta® pizza are helping to promote breast cancer awareness through their new The Strength of 1™ campaign, which includes sponsoring Bright Pink, the only national non-profit organization focusing on the prevention and early detection of breast and ovarian cancerin young women, while providing support to high-risk individuals. The mission of this The Strength of 1™initiative is to inspire everyone to realize they can make a difference in some way in the fight against breast cancer.

Take The Pledge - Join other women and take the pledge to show you have TheStrength of 1™ power within you. You can do so at www.facebook.com/freschettapizza

Women, you can also support The Strength of 1™ Thunderclap. To do so, visit www.thunderclap.it, click on Explore Thunderclaps, and choose "Cause" in the drop-down menu to find The Strength of 1™ Thunderclap. Click on the "Support with Twitter" or "Support with Facebook" button to help further spread the word about this The Strength of 1™ mission.


*Note: "I occasionally receive compensation in the form of products for posts. However, the opinions I share are solely my own."
Profile | Expo | Consumer Product Reviews in Video


As a BzzAgent I have the opportunity to try the Dr. Oetker Ristorante Pizza. I've seen these in the supermarkets locally but have never tried them. Ristorante is supposed to be the #1 frozen pizza in Italy and they come in six different varieties. The Bzz Campaign describes them as "a thin, crisp crusted pizza piled high with unique, fresh and generous toppings". Once I've had the chance to try one of these pizzas at home I'll post my review here and possibly have a chance for you to win a coupon to try it yourself. Be sure to check back soon!
Come on over and join me on Blogaholic Network


A great light summer dish to use up that overabundance of zucchini from your garden.

2 pounds zucchini
2 garlic cloves
12 large basil leaves
1/3 cup sunflower seeds
zest & juice of 1/2 lemon
2 tablespoons butter, divided
1 tablespoon olive oil, divided
1/2 teaspoon plus 1 tbsp. salt, divided
3/4 pound fusilli
1 cup fresh finely shredded parmesan cheese (about 2 oz.), divided


1. Bring a large pot of water to boil. Meanwhile, trim and discard ends of zucchini. Cut each zucchini into 3- to 4-in. lengths; cut each length into 1/4- to 1/2-in.-thick matchsticks and set aside. Chop garlic and set aside. Cut basil leaves into thin ribbons and set aside.
2. In a large frying pan over medium heat, melt 1 tbsp. butter with 2 tsp. olive oil. Increase heat to high and add half of the zucchini and 1/4 tsp. salt. Cook zucchini, stirring frequently, until soft and browned, about 5 minutes. Transfer zucchini to a plate with a slotted spoon, leaving as much of the butter and oil in the pan as possible. Repeat with remaining zucchini and 1/4 tsp. salt. Remove frying pan from heat and reserve.
3. Add remaining 1 tbsp. salt and fusilli to boiling water and cook to al dente. Drain and transfer to a large bowl.
4. Meanwhile, heat reserved frying pan over medium-high heat, add remaining 1 tsp. olive oil, lemon zest, lemon juice and the chopped garlic, and cook until fragrant but not browned, about 1 minute. Add reserved zucchini and sunflower seeds. Cook, stirring, until well combined. Add zucchini mixture and reserved basil to cooked fusilli and toss to combine. Add 1/2 cup parmesan and remaining 1 tbsp. butter. Toss until butter melts and everything is well combined. Divide among 6 pasta bowls. Sprinkle with remaining 1/2 cup parmesan and serve immediately. Enjoy!


- Posted using BlogPress from my iPad
With the Summer nearing half over mother nature keeps cranking up the heat. We are always looking for a cool treat on a hot evening. I don't know about you but we don't always have the funds to run out to Rita's. As a less expensive alternative I like to make these up using the fruits I've gathered at the farmers markets. A Granita is a cooling, icy slushy originated in Italy. These can be made in a variety of sweet refreshing flavors, such as melon, peach, strawberry, blueberry and even coffee.


4 - 5 cups seedless watermelon chunks, packed (about 1 1/2 lb)
1 cup water
1 cup sugar
1 tablespoon fresh squeezed lemon juice (you can substitute with RealLemon brand bottled juice)

Place the watermelon chunks in a blender and puree until smooth. Strain through a mesh sieve into a bowl (you should have 2 cups).
In a sauce pan combine the sugar and water. Heat over high heat, stirring, just until the sugar dissolves. Pour the syrup and lemon juice over the watermelon puree and stir well. Pour the mixture into the frozen cylinder of an ice cream maker, insert the paddle and place on the lid. Turn the crank every few minutes to stir following your machines instructions.

An alternate method of doing this if you don't own one of those nifty devices it to pour the mixture into a 9 x 13 metal or glass baking dish. Place uncovered into the freezer until ice crystals begin to form, about 1 1/2 - 2 hours. Using a fork, stir to break up the mixture. Return to the freezer and freeze, stirring with the fork every 30 minutes to prevent it from turning into a solid mass. It should be crystalized and sludgy in another 2 hours.

To serve, spoon into chilled serving dishes and enjoy!

Serves 6

- Posted using BlogPress from my iPad
As a member of VocalPoint I'm passing along a free offer to my readers.


Have you heard about Mott's for Tots®? This healthy treat is full of benefits, not sugar! Check out a few of the reasons kids and moms both love this juice:

40% less sugar than 100% apple juice
Delicious taste!
No artificial sweeteners
100% vitamin C
Conveniently pre-diluted with purified water
Available in 64 oz. multi-serve bottles or 6.75 oz. 8-pack juice boxes

You can spoil your kids with Mott's for Tots. Because it's not every day you find a tasty treat that kids love and moms love to give!

Simply go to www.vocalpoint.com/mottsfortots and sign up for your sample today!


Mott's, Mott's For Tots, Mott's Healthy Harvest, Hand Picked Goodness are trademarks of Mott's LLP. ©2011 Mott's LLP.


- Posted using BlogPress from my iPad


They seem innocent enough, made with real fruit. If you have kids chances are you've bought them or their counterparts, Fruit By The Foot or Fruit Snacks. You think "Hey, they're REAL fruit! Great snack alternative to candy." Well, I'm going to tell you that after yesterday's dental check up with Maddie, that these things are far from good for your children. In fact they are far worse than candy! Yes, they may be made from real fruit but they are very high in corn fructose. What does that mean? When your child eats these, they lay in the teeth longer causing they're precious baby teeth to decay at a faster rate. After discovering that my almost 6 year old needs almost $5000.00 worth of dental work done, these thing will never again be brought into our home.
Our dentist was wonderful in explaining all of these things to us. She gave us as much time as we needed to learn some valuable (but unfortunately a little too late) advise. Below are some of the things that she recommended.

~ Your children can never brush too much. In fact at young ages they should brush after everything they eat.

~ Change their snacking habits NOW. Doing so will last them well into adulthood.

~ Teach them to make healthy snack choices. Let them choose but present them with healthy alternatives.

~ Don't even bring the bad stuff into your home.

~ Be aware of what your children drink also. Soda, Kool-Aid, orange drinks and even some of the box juices are all high in cavity causing sugars.

Finally, she presented us with a list of healthy alternatives for Madison's snack times. I've listed a few for you below.

~ Flavored waters, (children may resist these at first but eventually they will prefer them).

~ Fresh fruits and veggies. Be creative. Strawberries with whipped cream for example. The dentist actually explained that although the whipped cream is sweet, it melts from the mouth quickly and doesn't stay stuck to the teeth for a long period of time.

~ Ice cream, frozen fruit pops, frozen yogurt. These all all good alternative as they too melt quickly and do not stay stuck to the teeth.

~ An occasional Hershey Kiss. She explained the occasional treat of chocolate can't hurt. It too melts and doesn't stay sitting on those precious baby teeth.

So from one mom to all you parents out there, take this advice to heart. You won't want to be in our situation, looking at $5000.00 in dental bills and no insurance to cover any of the costs!

- Posted using BlogPress from my iPad
In celebration of Easter I thought I'd share a secret for the perfect hard boiled egg.
You will not taste the salt or vinegar in these eggs but the shells will peel off easily without tearing or sticking...guaranteed! Enjoy!


6 cups water
1/4 cup distilled white vinegar
1 tablespoon salt
8 eggs

1. Combine water, salt, and vinegar in a large pot and bring to a boil over high heat.
2. Add eggs, one at a time being careful not to crack them.
3. Reduce heat to a gentle boil and cook for EXACTLY 14 minutes. (this is important, no more no less time)
4. Remove the eggs from the hot water and place into a bowl of ice water or run under cold water until cooled off.
5. Let eggs cool completely for about 15 minutes.

The eggs will now peel perfectly. Can store unpeeled in refrigerator for 1 week.

- Posted using BlogPress from my iPad

Location:Brookfield Rd,Lititz,United States


I have always loved these from when I was a kid and my mom used to make them. Of course, every time I make them they never harden correctly (not sure what I do wrong) but the butterscotch is the best as it has a caramel taste. I am still convinced that my mom secretly cast a spell on this recipe and that she is the only one the recipe works for....see how they turn out for you!!


P.S. This still never prevents me from trying every year to make them. And even when they don't harden correctly I still eat the gooey globs of goodness!!


2 cups Sugar
3/4 cup Butter
6 oz can Evaporated Milk
1 4 oz box Pudding Mix (Chocolate or Butterscotch)
3 1/2 cups quick cook Oatmeal


Bring sugar, butter and evaporated milk to a rolling boil, stirring constantly, for 3 minutes or until sugar is completely melted. Remove from heat and stir in pudding mix and oatmeal. Mix and let cool for 15 minutes. Drop by teaspoon onto wax paper and let cool completely.
Are you running out of ways to use up that last bit of leftover turkey? Try something a little different and on the lighter side. 


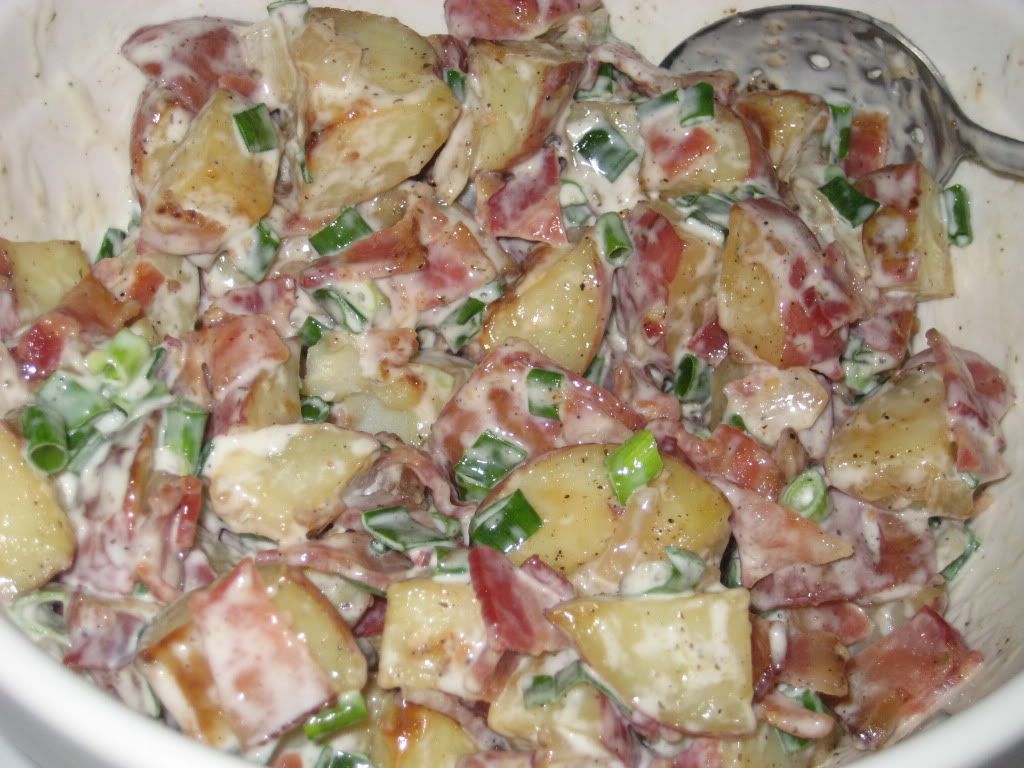
Turkey and Potato Salad


1 lb small Red Potatoes
1/3 cup light Mayonnaise
1/4 cup Milk
1/3 cup light Sour Cream
2 tbsp Dijon Mustard
1/4 tsp Salt
2 Green Onions, chopped
1 1/2 cup Turkey, cut into bite-sized chunks
2 stalks Celery, sliced
1 small Red Pepper, chopped


1. In sauce pan, cover potatoes with water and bring to a boil on high heat. (HINT: I like to cut them into bite-size chunks before boiling to save time) Reduce heat to low, cover and simmer 15 minutes or until potatoes are just fork tender. Drain and run under cold water until the potatoes are cool.
2. Mix Mayonnaise, sour cream, milk, mustard, salt and green onions until blended. Add turkey, celery, red pepper and potatoes, stirring gently.


Makes 6 servings  

Thank you to all of my Friends and followers. Have a safe and happy holiday! Check back often as I will be getting back to regularly adding new and exciting things for the holidays!!
Photobucket

With all of the apples coming ready on the Golden Delicious Apple tree outside our front door I needed to start coming up with things to do with them. These turned out simply scrumptious!

1 large apple, such as the golden delicious or granny smith
1 1/2 cups all purpose flour
1/4 cup regular uncooked oatmeal
2 tablespoons sugar
2 teaspoons baking powder
1/2 teaspoon baking soda
1/2 teaspoon salt
3/4 cup milk
2 eggs
1/4 cup butter, melted
3/4 cup finely grated cheddar cheese

1. Pre-heat oven to 400 degrees and butter each cup in a standard muffin tin.
2. Peel, halve and core the apple, cut into 1/8 inch dices.
3. In a large mixing bowl mix together the flour, oatmeal, sugar, baking powder, baking soda and salt and set aside. In another bowl whisk together the eggs, milk and melted butter until smooth then stir in the apples and cheese. Add the dry ingredients and stir until just blended, don't over mix.
4. Spoon into the muffin tims, filling each cup about 3/4 full. Bake about 20 minutes or until a toothpick inserted into the center comes out clean. 
5. Cool in the tin for 3 minutes, then remove. Can be served warm or cold.


These are great with a honey butter!! Enjoy!
Photobucket

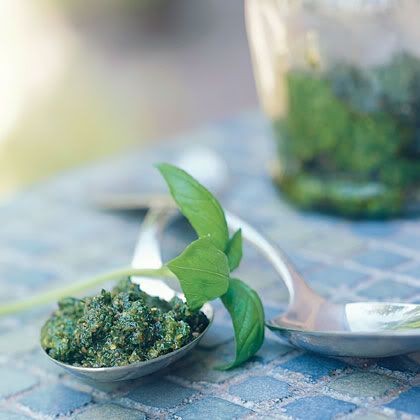
The new things you learn about those you love...Who knew my husband liked Pesto? I didn't..*sigh*! So with an overabundance of basil, I think I will make some of this over the weekend and freeze it!

Ingredients
  • 2 cups fresh basil leaves, packed
  • 1/2 cup freshly grated Parmesan-Reggiano or Romano cheese
  • 1/2 cup extra virgin olive oil
  • 1/3 cup pine nuts or walnuts
  • 3 medium sized garlic cloves, minced
  • Sea Salt and freshly ground black pepper to taste
1 Combine the basil in with the pine nuts, pulse a few times in a food processor. (If you are using walnuts instead of pine nuts, pulse them a few times first before adding the basil.) Add the garlic, pulse a few times more.
2 Slowly add the olive oil while the food processor is on. Stop to scrape down the sides with a rubber spatula. Add the grated cheese and pulse again until blended. Add a pinch of salt and freshly ground black pepper to taste.


Makes 1 cup.


Serve with pasta, or over baked potatoes, or spread over toasted baguette slices.


*TIP: If you want to freeze the pesto, omit the cheese (it doesn't freeze well). Line an ice cube tray with plastic wrap and fill each pocket with the pesto. Freeze and then remove from the ice tray and store in a freezer bag. When you want to use some, defrost and add in the grated Parmesan or Romano.

Every time we visit my Dad and Stepmother in southern Ohio we can't go away without having Betty make a huge pot of these, they are to die for!!

Ingredients

2 cups all-purpose flour
3 tablespoons shortening
1 teaspoon salt
1/4 cup water

Directions

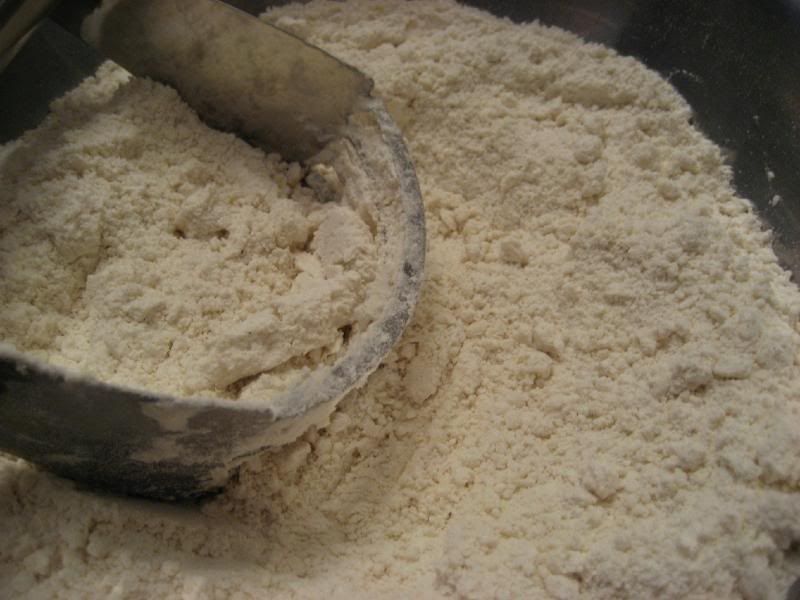
1. Mix together flour and salt. Cut shortening into flour/salt mixture using a pastry blender, fork or two knives. Stir in water to form a soft dough.

Photobucket

2. On a floured surface, roll out dough very thin with a rolling pin. Cut into 1 inch wide strips. Tear 1 inch long pieces of dough from these strips and drop in with your simmering chicken and broth.

3. Cook 10 minutes with the pot lid off, then 10 minutes more with the lid on. Serve with the broth and chicken meat.